
The multiple exposure is an amazing Photoshop effect
that is easy to create using any software that allows you to work with
layers. In this tutorial we will show you how to create this Photoshop effect to clone yourself and get a stunning effect on your photos.
Photoshop tutorial – Multiple Exposure video
In order to create this impressive
effect you need only two things: a device capable of taking Photos
(smartphone, DSLR camera, pocket camera, etc) and a software that allows
you to work with layers and layer masks like Gimp (free), Photoshop
Elements or Photoshop CS or CC or other free photo editors that allows
you to work with layers and layer masks.
Nowadays, modern smartphones are capable
of taking high resolution images. Simply make sure that on your phone
camera settings you set the highest resolution available for pictures.
On some phones it’s simply called “Fine”. If you use Photoshop you don’t
even need a tripod because you can align the images but it’s highly
advisable.

Camera quality settings on a Samsung Galaxy S5 (android)
A few tips before you make the multiple exposure
I made this multiple exposure photoshop effect
several times and in time I learn a few things. Follow these tips and
you will save a lot of time when processing the multiple exposure
photos.
1 – No flash
Try to avoid using the on camera flash.
Reflections created by it can make the final image look bad. Also the
light that an on camera flash produces is awful and it creates hard
shadows behind objects. If really necessary, use an off camera flash and
make a few test shots and make sure the light is ok before you take
your exposures. Once you have it in the right spot, don’t move it.

2 – Use a tripod
Take the multiple exposures using a
tripod if possible. The objective is to take the photos without moving
the camera between shots. That way you will not have to align the images
when you stack them. If you use a smartphone or a pocket camera and you
don’t have a tripod, you can use something to rest the camera against.
If you cannot do it and you have to do it hand held, try to move the
camera as little as possible between shots by using reference points.

3 – Constant lighting
It’s important that all shots that you take for your multiple exposure have
the same light because when you combine them it has to be seamless. If
you do it indoors, turn on all the lights in the room or house. That way
you can take the photos using a higher shutter speed and there will be
less risk of shaky images and the light will be uniform across all
exposures. Avoid changing lights as much as possible.

Creating the multiple exposure effect
For this tutorial I took 3 photos of myself doing different things on different places of the living room with my camera standing on a tripod and using the self-timer. Self timer is also available on pretty much all camera and smartphones but you can also ask someone to take the pictures for you. If you’re on a big place you can take more than 3 photos and if you change clothing for each shot you will get a more impressive multiple exposure effect.
Blend the images in Photoshop
Open the images you just took and stack them on separate layers on the same document. Photoshop allows you to open several images on the same document and stack them on layers and align them automatically. Just go to File>Scripts>Load files into Stack. You can also do it manually if you don’t have that menu on your Photoshop, just load the files into layers and then select all layers and go to Edit>Auto-Align Layers. If the images are not 100% aligned, use the arrow keys on your keyboard to align them. I used a tripod so I don’t have to align the images.Now you can make the multiple exposure effect in Photoshop. Once your images are aligned, create layer masks and mask the images to reveal the places where you are and make it look like there is multiple you on one image


Multiple Exposure/Clone Effect – Result

The multiple exposure effect is pretty easy to create in Photoshop but a bit of practice and trial en error is necessary. Enjoy

Stock used
- Mermaid: http://jaymasee.deviantart.com/art/Mermaid-Tethys-10-260779127
- Underwater limit: http://tigers-stock.deviantart.com/art/480-underwater-partition-01-294143847
- Underwater light rays: http://linzee777.deviantart.com/art/Underwater-Background-3-151508960
- Islands and some parts of the sea: http://linzee777.deviantart.com/art/Underwater-Background-3-151508960
- Sky and waves: http://arwenarts.deviantart.com/art/STORM-AT-SEA-BG-STOCK-II-146413134
- Dark clouds: http://stock-jm.deviantart.com/art/Storm-Sky-Stock-1-98905495
- Rocks above the water: http://mogieg123.deviantart.com/art/Low-Tide-on-Kauai-Beach-255212521
- Rocks underwater: http://meihua-stock.deviantart.com/art/james-bond-island-1-1-62499733
- Old Ship: http://gioja.deviantart.com/art/old-Ship-281913399
- Water splashes: http://frostbo.deviantart.com/art/Water-Splash-PNG-SET-3-277540836
Step 1
I often create a transparent layer at
the beging because it’s easier for me to fit the pictures in.First we
bring our mermaid stock on our transparent layer and the limit of the
under water foam.We need only the foam from that stock so we’ll erase
the other parts using a soft brush.

Step 2
Now we need some light rays under the
water so let’s bring the rays stock.From this stock image we’ll use some
other parts too but now we’ll let only the rays in the picture so with a
soft brush erase the parts we don’t need.After this the image should
look like this.

Step 3
In this step we bring the sky stock and
add some light effects in the water with these settings.We also erase
from here some parts of the sea with a soft brush.

Step 4
It’s time to bring again the stock that
we used for the underwater rays,but now we’ll use from it only the
islands and some parts of the water.We also need some dark clouds over
the sea.Erase here also the parts we don’t need with a soft brush.

Step 5
We need now to add some rocks in the water.It’s simple but we have to find the perfect size for the underwater rocks using the Free Transform.First we cut those above the water as you can see in 5a image.After we cut the island(you can use the Quick Selection Tool
for cuting,see 5b) to create the underwater rock and after erasing with
the same soft brush the parts we don’t need and set the layer to Soft Light.Do the same with the other rock.

Step 6
In this step we’ll add the ship and the
water splashes around it and the rocks.Because the splashes are.png
files will be easier to select those you think it fits best.

Step 7
Now it’s time to change some tones.First we use a Photo Filter layer with a Warming Filter(81) and set the density to 59% (7a).Then we add a Color Balance layer with the settings from 7b.


Step 8
After we Flatten Image
it’s time for the final adjustments.First we’ll use the Dodge&Burn
technique.If you are new into this see the Tutorials>Manipulation
Secrets>Dodging&Burning section from the site for detailed
explanation about this technique.After this we’ll add some sharpness
like in my previous tutorials. Go to Image >Mode >Lab Color.Then go to Channel palette and click on the Lightness channel.Now go to to Filter >Sharpen >Unsharp Mask.Here are the settings i used for this Amount 65%, Radius 3, Threshold 2.That’s all.Enjoy.
Final Result


Mixed Art - Photoshop Action 12000444
Photoshop ATN | 29 Mb
Photoshop ATN | 29 Mb
Features
- Photoshop atn file.
- Separated layers.
- Work with english version photoshop.
- Preview image not included.
Item contains
- Photoshop action.
- Instructions in pdf.
- 15 png textures.
Download Link:
http://rockfile.eu/8jswiz9g01le.html
http://turbobit.net/906wrzwoq2x2.html
http://faststore.org/7prregtyhiam
http://rapidsonic.com/6zoafmiiwmst/PSDKEYS.COM_mixed_art_photoshop_action_12000444.rar
http://www.uploadable.ch/file/fzVqJVsS9ZdB
http://www.uploadcloud.pro/qm3m73a5t63c/PSDKEYS.COM_mixed_art_photoshop_action_12000444.rar.html
Save over 30% when you purchase all of our Khroma Luxe™ Digital Beauté products all in one bundle! The Khroma Luxe-Bundle includes all 3 Khroma Luxe™ products with OVER 100 beauty defining actions for one awesomely discounted price.
- Valued at $105.
- Includes: Khroma Luxe: Artisan Collection, Katwalk Collection, KolourPro and a BONUS collection O'Naturale Eye's!
- Over 100 beautifying actions!
- Includes links to video tutorials
- Compatible with PC & Mac.
- Designed with English versions of PS & PSE.
- Includes ALL files for Photoshop Versions.
- Works with English versions of PS and PSE
- Designed for Photoshop CS2-Creative Cloud and PSE 9-Up
- Compatible with PC & Mac.
WHAT'S INCLUDED:
- ATN. Files for all versions of Photoshop. (PS CS2-CC, PSE 9-10 and PSE 11-13)
- View Video Tutorials Here: https://vimeo.com/seasaltco/videos
- PDF Info Guide -Terms of Use
Download Link:
https://www.oboom.com/QILDKAU8
http://turbobit.net/05m5ijaanvq7.html
http://fileparadox.com/3k1h6hxiptmi/PSDKEYS_Retouching_Actions_Bundle.rar
http://junocloud.me/2sbh02h8xp7l/PSDKEYS_Retouching_Actions_Bundle.rar.html
http://www.uploadable.ch/file/2DyEJJfPpkKf/PSDKEYS_Retouching_Actions_Bundle.rar
http://www.uploadcloud.pro/jhct6a98rggl/PSDKEYS_Retouching_Actions_Bundle.rar.html


Khroma Luxe-KolourPro Collection 278426
ATN, PNG, JPG | Adobe CS2+ | 51 Photoshop Beauty Retouching Actions | 2.5 Mb
ATN, PNG, JPG | Adobe CS2+ | 51 Photoshop Beauty Retouching Actions | 2.5 Mb
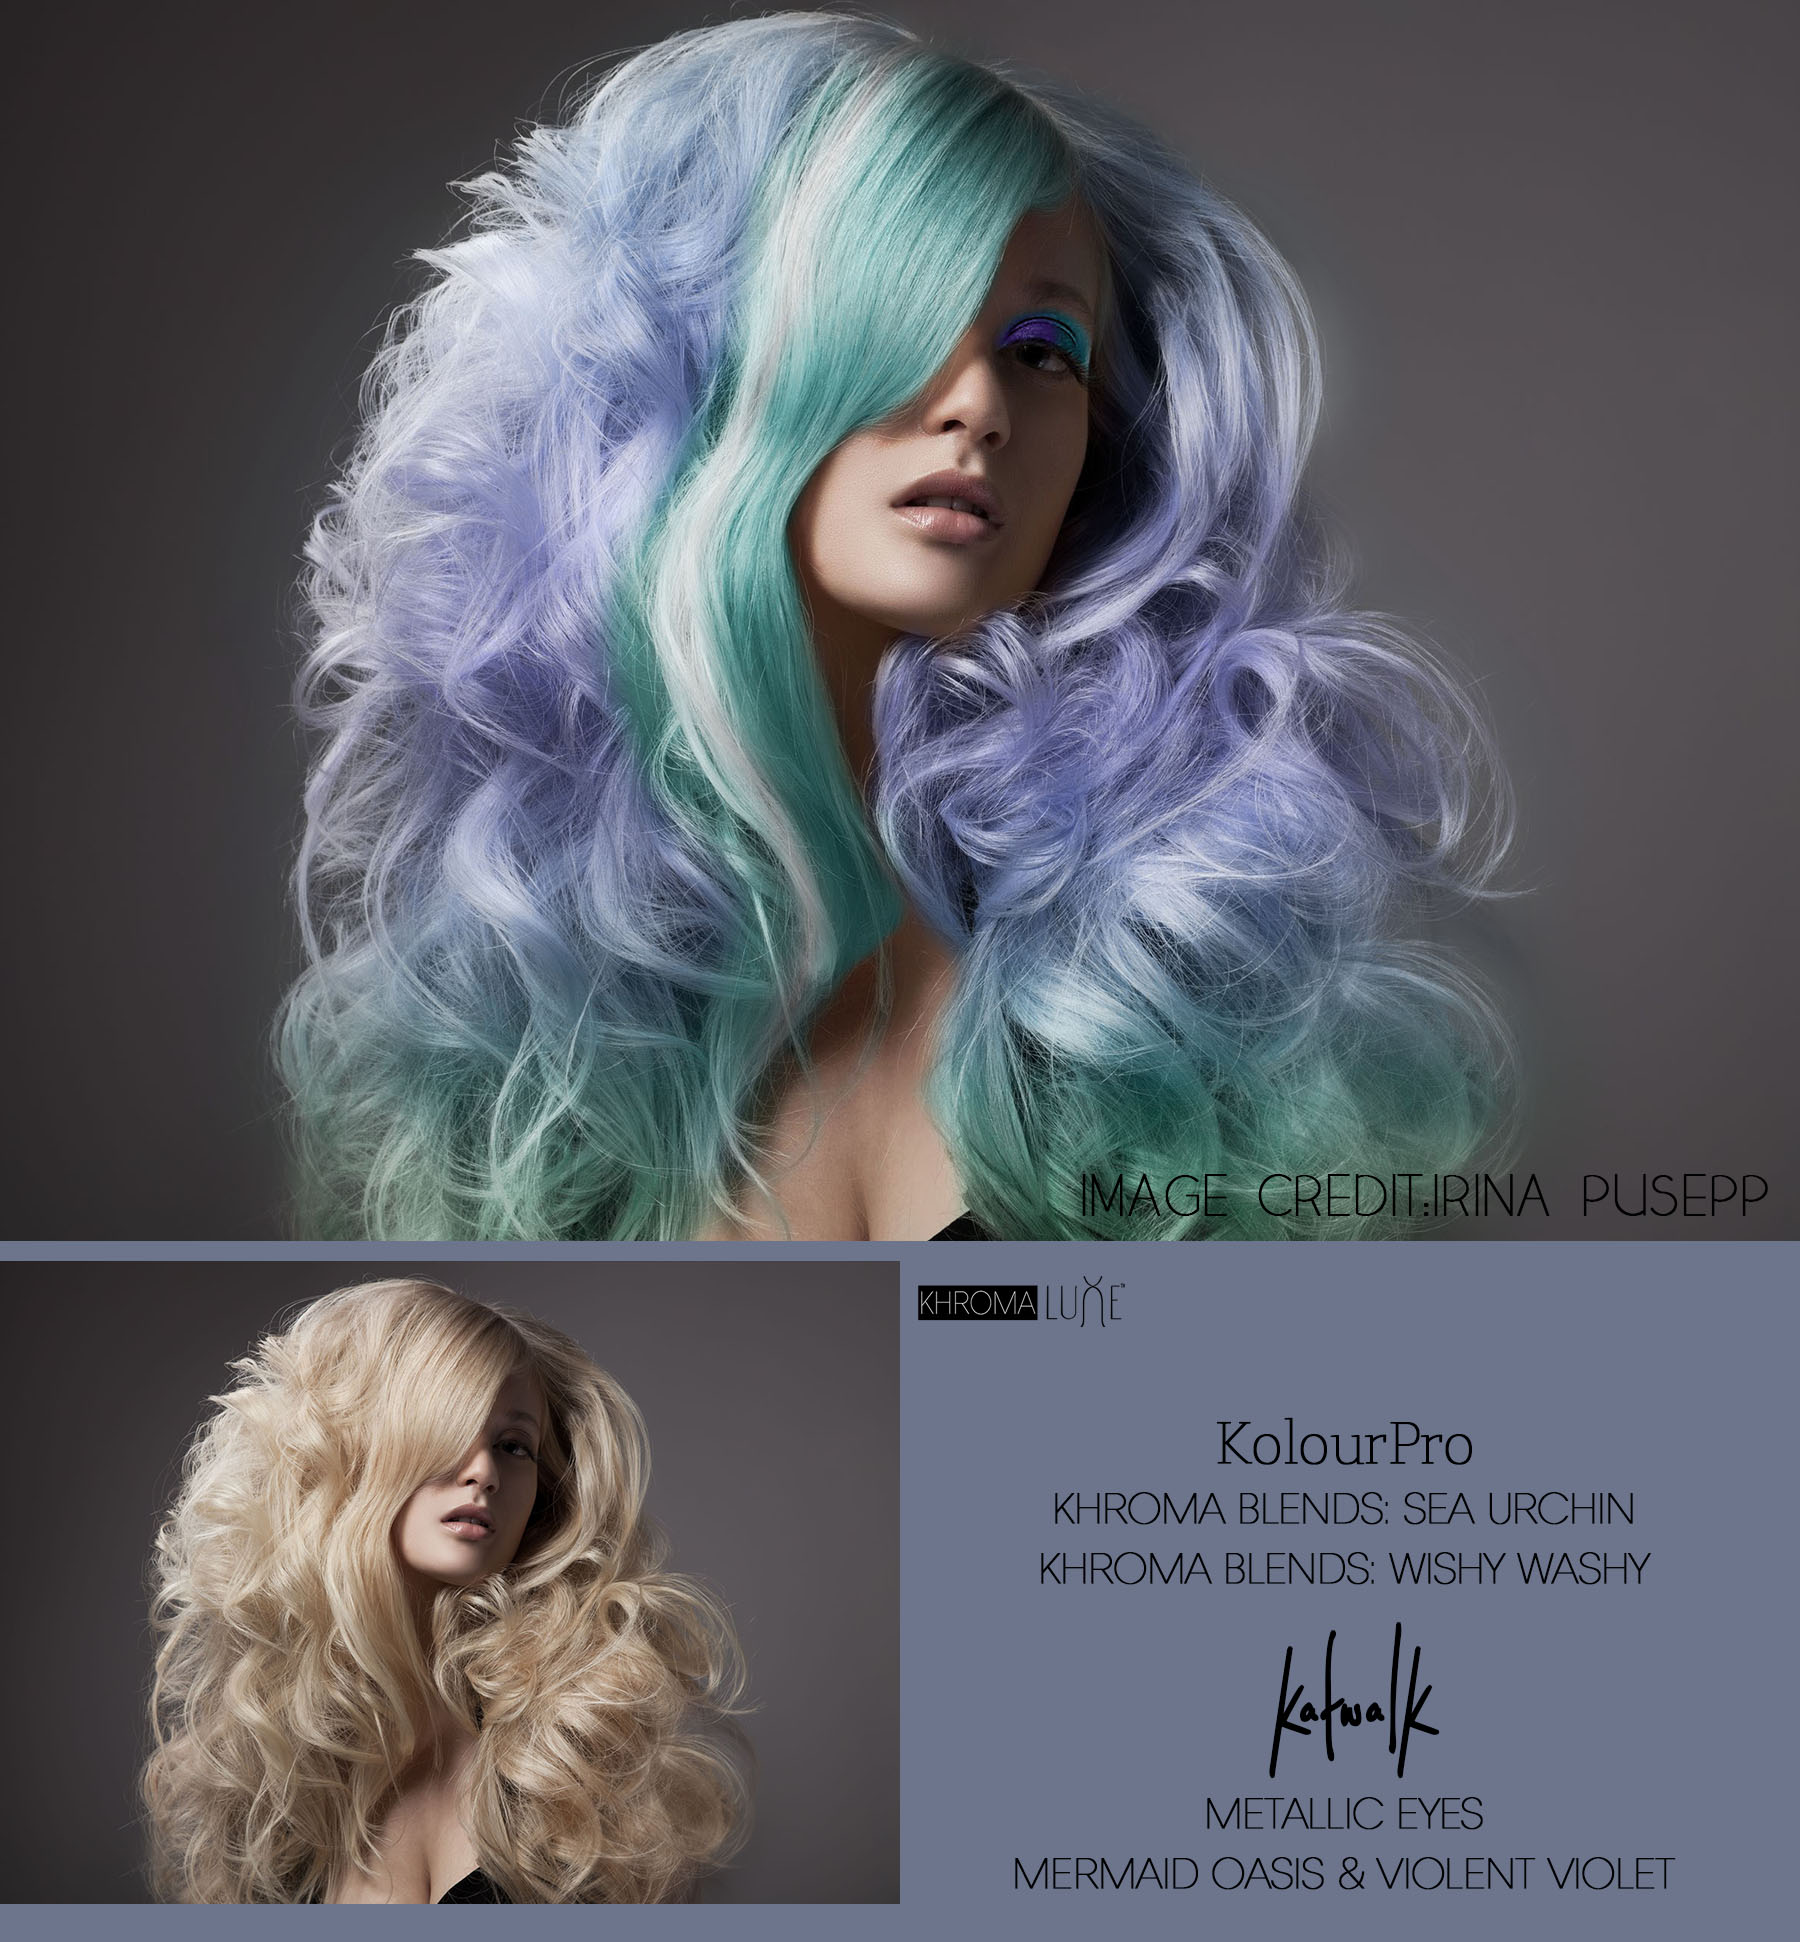
The Khroma Luxe™-Kolour Pro Collection is complete with 51 actions that include: Hair Essentials that are used for fine tuning hair (banish frizz, richen hair color, add luminous shine), Kolour Fixes that are designed to color correct unwanted tones in hair, Hair Colors and also our one of a kind Bleaching Action.
Each color has been specifically blended to give the true tones of each shade no matter the natural hair color. With our wide range of shades so you can create dramatic reds, stunning brunettes, pristine blondes or push the edge and redefine self-expression.
WHAT'S INCLUDED:
51 Photoshop Beauty Retouching Actions.
URL file that will take you to view our tutorial videos.
Zip file includes all files for Photoshop CS-CC and PSE 9-Up.
ACTIONS INCLUDED:
==== ESSENTIALS ====
Darken/Lighten Hair
Beautiful Details
Keratin Therapy
Argan Shine Spray
Richen Hair Color
Khroma Blends {Ombre Hair Effects}
==== KOLOUR FIXES ====
Red/Brass Tone Corrector
Yellow Tone Corrector
Golden Tone Corrector
Green Tone Corrector
Blue Tone Corrector
Violet Tone Corrector
==== HAIR COLORS ==== (There is a section for each natural hair color: Blonde, Red, Brown, Black)
HAIR-PREP/BASE
Khroma Bleach
Purples
Blues
Pinks
Greens
Browns
Reds
Blondes
Jet Black
COMPATIBILITY:
Works with English versions of PS and PSE
Designed for Photoshop CS2-Creative Cloud and PSE 9-Up
Compatible with PC & Mac.
Download Link:
http://rockfile.eu/ftdx99u82mzl.html
http://turbobit.net/ef022f047uki.html
http://24uploading.com/yj2q5h07vhnu/PSD_S.COM_Khroma_Luxe_KolourPro_Collection_278426.rar.html
http://faststore.org/lk3d2h67bx9e
http://rapidsonic.com/muc8u4oi073v/PSDKEYS.COM_Khroma_Luxe_KolourPro_Collection_278426.rar
http://www.uploadable.ch/file/8Km7ktyfCucz
http://www.uploadcloud.pro/lp09eooeczgp/PSDKEYS.COM_Khroma_Luxe_KolourPro_Collection_278426.rar.html


Everything is very straight forward. I have tried to make the item as very easy to use.
Features:
These actions are designed to transform your photos into Double Exposure Photoshop Action.
- High quality action
- Easily editable & customizable
- Non destructive
- Work on every photos
- Well Grouped Layer
Included:
- One ATN File
- One Help Text File (Instructions)
Added Extra Five Color For More Fun.
These action are specially made for photographers, graphic designer & artists.
The action has been tested and working on Photoshop (English versions)CS3,CS4,CS5,CS6,CC.
I recommend using the action on photo’s with high resolution for the best results.
Note: Photo Credit goes to http://www.500px.com
Download Link:
http://rockfile.eu/u5pfy4yikihu.html
http://turbobit.net/dednxub9ugh2.html
https://2drive.net/7hwniwwzpoa8/PSDKEYS.COM_double_exposure_ps_action_11620317.rar.html
http://faststore.org/y1e3luh2t1vl
http://rapidsonic.com/8v8vcn20cr2n/PSDKEYS.COM_double_exposure_ps_action_11620317.rar
http://www.uploadable.ch/file/kX4kF8tZ9vmc/PSDKEYS.COM_double_exposure_ps_action_11620317.rar
http://www.uploadcloud.pro/9zw3gr85xtha/PSDKEYS.COM_double_exposure_ps_action_11620317.rar.html
